To bring you up to speed FreedomPop.com has a nifty offer: "free" 4G internet access. You have to put a "refundable deposit" on the hardware ($49 for the USB stick, $99 for the wifi hotspot), and 500 MB per month is free. You can also get extra free MBs through special offers, or pay for higher data packages. And coverage is limited to a handful of metro areas, but for light/emergency usage, it's a great deal.
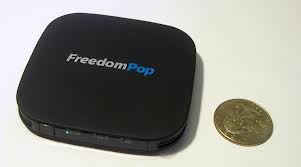
Now for my specific situation, I opted for the wifi hotspot (Photon model#IMW-C910W). It works reasonably well when you're in a good coverage zone. My problem was that I am just at the edge of coverage, and my Photon as-is would not connect up to the 4G signal. I would disappointingly see the flashing red LED all the time, no matter which part of my house I placed the hotspot. This got me to thinking that perhaps I'd have better luck with a larger antenna. The only problem was that the Photon has no jack to add an antenna. This is where the experimentation/hacking comes into play. In the end I was able to add a big antenna and achieve a good data connection in the location where I was able to get nothing prior.
Note: The actions described here probably void some agreement somewhere, so don't try anything unless you're willing to break your device. Exercise care against electrostatic and battery shorting mishaps. Freedompop is changing their technology sometime in 2013, after which this model hotspot will be useless. My actions may not be the best solution, but it worked for me.
| Firstly, turn off the hotspot and remove the USB cable. Then pry the top cover off the unit (the top simply says "FreedomPop" on it) as it is only held plastic clips. With the cover off you'll see the top side of the circuit board, held in place by 4 screws. The black and grey wires on the side go to the battery which lies underneath the circuit. at the upper side of the board are the (what I presume to be) 4G antennae. In my experiments the left one ("MWG6x B") seemed to be needed the most to establish a 4G connection. | 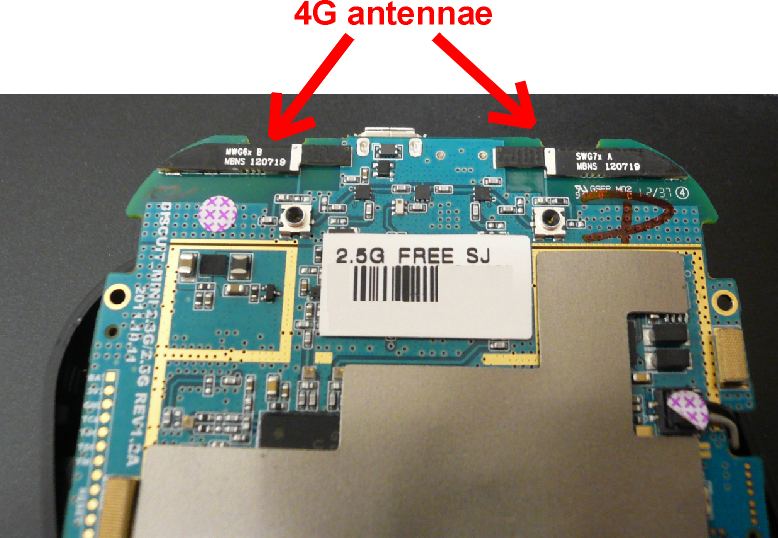 |
| Next step, lift off the built in antenna. It is surface mount soldered to the circuit board. I found it easiest to lift the circuit above the plastic housing, and then use a razor blade to pry off the antenna. Try not to scratch or nick the PCB itself. | 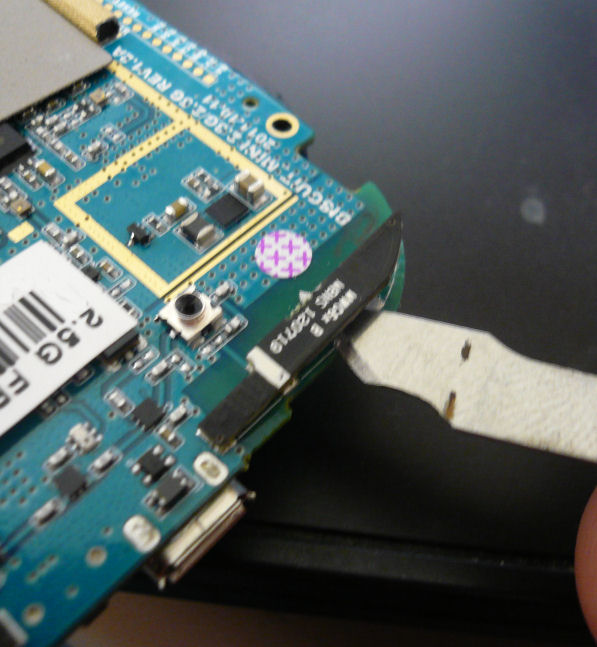 |
| With the antenna off you'll see 4 solder pads. It seemed like the left two pads weren't connected to anything, and that the right two were the only ones that are needed. | 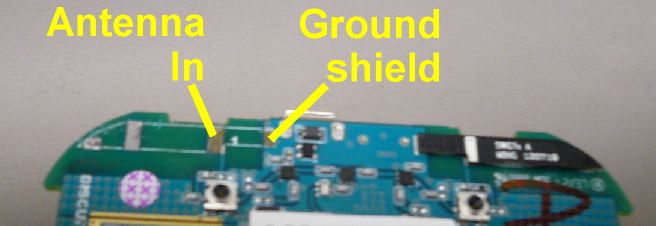 |
| Where to get an antenna cable & jack? I took apart an old wifi access point I had (like the one pictured to the right). It has the 2 conductor shielded coaxial cable and SMA connector. | 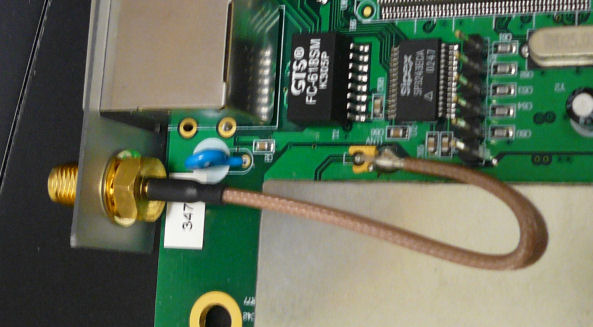 |
| With my cannibalized SMA cable I soldered the inner pin to the left pad, and the shielding to the ground pad. The soldering to these surface pads is not robust, so I later rigged up something to hold the cable and Photon innards rigidly. | 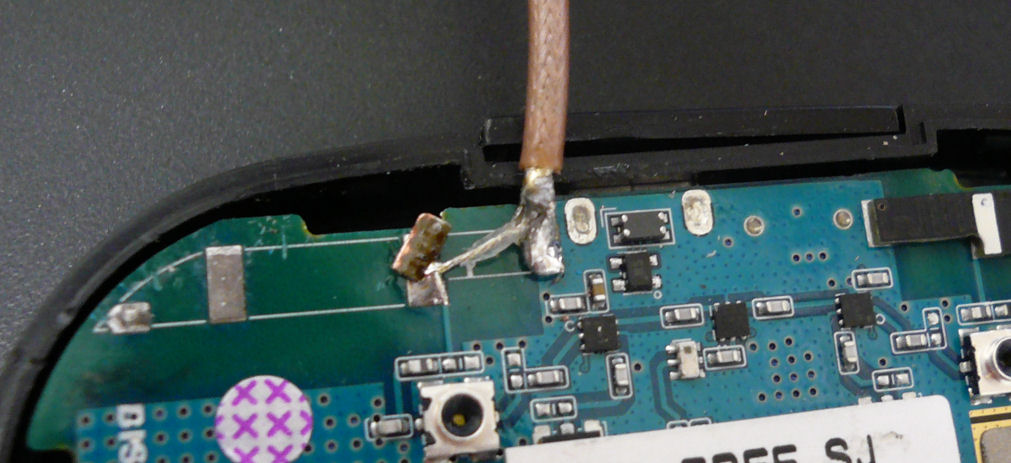 |
| With the soldering complete I was ready to add my external antenna. In this case I bought a 2.4 GHz Yagi antenna from ebay for $10.50. I then pointed the Yagi out the window, and to my somewhat surprise, the Photon hotspot locked in to a solid amber 4G data signal. Make sure that the little spikes on the Yagi are vertical because it matters. | 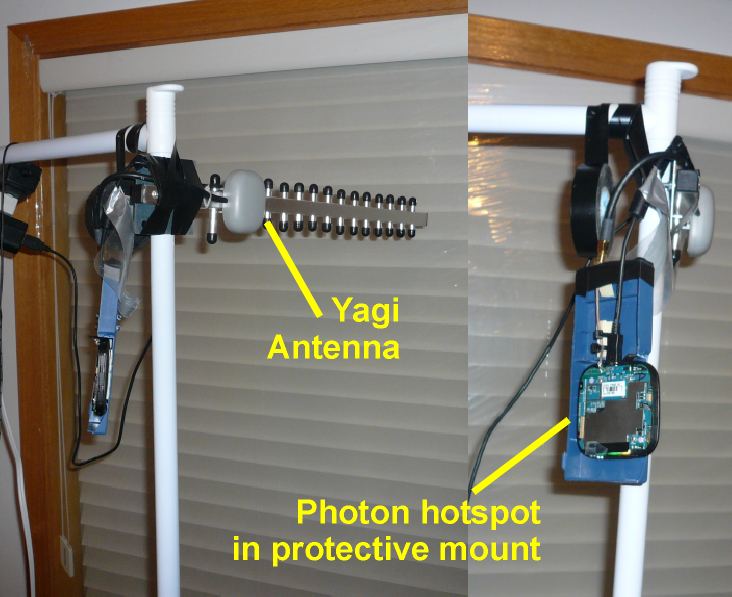 |
There you have it. I hope this information helps. I figure the same rigging could be added to the right antenna too. In my case the 4G connection came in just doing the left, so I didn't bother, but I would have tried such next if needed.